By Emily Bennett | Updated: Nov 14, 2025
- Update Log: Added setup steps for 2025’s top-rated hardware devices & updated security checklists.
📝 Editor’s Note:
“I remember staring at my first wallet setup screen, terrified I’d click the wrong button and lose my money. That’s why I wrote this guide. No jargon, no confusion—just the exact steps I use to teach my own family how to keep your crypto safe.”
— Emily Bennett, Content Lead at BeginnerWallets
So, you’re ready to own your first bitcoin or digital asset? That’s exciting! But before you buy, you need a safe place to put it.
Setting up a cryptocurrency wallet is the most important step in your journey. Think of it like opening a bank account, but better: you are the bank.
Whether you want a convenient app on your phone or a secure physical device in your safe, this guide will walk you through exactly how to choose a wallet, secure your private key, and make your first transaction without breaking a sweat.
Quick Start: The 3-Step Checklist
If you are in a rush, here is the high-level process:
- Choose a Type: Decide between a software wallet (app) or a hardware wallet (device).
- Secure It: Write down your recovery phrase offline (never screenshot it!).
- Fund It: Transfer crypto from an exchange or buy directly in the app.
Step 1: Choose Your Wallet Type
The first decision is simple: Do you want convenience or maximum security?
Option A: Software Wallet (Hot Wallet)
A software wallet is an app you download on your phone or computer. It is a hot wallet because it connects to the internet.
- Best For: Beginners, small amounts, and daily spending.
- Popular Examples: Coinbase Wallet, Trust Wallet, MetaMask.
- Pros: Free, easy to use, great for quick access.
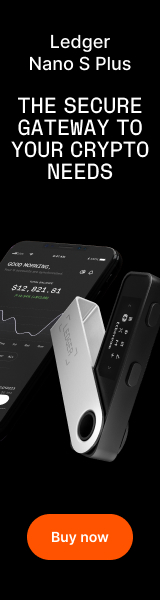
Option B: Hardware Wallet (Cold Wallet)
A hardware wallet is a small physical device (often looks like a USB drive) that keeps your keys offline. It is a cold wallet because it never touches the internet directly.
- Best For: Storing life savings and large amounts of cryptocurrencies.
- Popular Examples: Ledger , Trezor.
- Pros: Unhackable remotely, extremely secure.
Pro Tip: Most experts use both. A wallet app for pocket money, and a hardware wallet for the vault.
Step 2: Download and Install
Once you choose a wallet, go to the official website.
- Warning: Never click ads. Scammers create fake sites to steal your password and keys. Always verify the URL.
For a wallet app, download it from the App Store or Google Play. For a hardware wallet, you will need to install the companion software (like Ledger Live) on your computer to initialize the physical device.
Step 3: Create Your Wallet & Secure the Keys
This is the most critical part. When you open the wallet app, it will ask if you want to “Create a New Wallet.”
The Private Key & Recovery Phrase
Your wallet will generate a “Recovery Phrase” (usually 12 or 24 random words). This phrase is the human-readable version of your private key.
- CRITICAL: Write these words down on paper.
- NEVER: Take a screenshot, save it in your email, or type it into a notes app.
- WHY? If your phone is hacked or lost, this paper is the only way to store your crypto and recover your funds. Anyone who has these words has full control over your money.
Set a Strong Password
You will also need to set a password or PIN. This protects the app on your device, but remember: the private key (recovery phrase) is the real master key to your digital wallet.
Step 4: Your First Transaction
Now that your wallet is set up, let’s get some cryptocurrency in there.
Finding Your Wallet Address
To receive funds, you need your public address. Think of this like your email address—it’s safe to share.
- Open your wallet and click “Receive.”
- Select the cryptocurrency (e.g., Bitcoin ).
- Copy the long string of characters (your wallet address) or show the QR code.
Transferring Funds
Go to your crypto exchange (like Coinbase ) account:
- Select “Withdraw” or “Send.”
- Paste your new wallet address.
- Double-Check: Always read the first 4 and last 4 characters of the address before hitting send.
- Confirm the transaction.
Within minutes (depending on the network), your digital asset will appear in your new wallet!
FAQ: Common Beginner Questions
What is the difference between a public and private key?
Think of a mailbox. The public key (address) is the slot where anyone can drop mail (money). The private key is the key that opens the box so you can take the mail out. Never share your private key.
Can I store Bitcoin and Ethereum in the same wallet?
Yes! Most modern software wallets are “multi-chain,” meaning they can store many different cryptocurrencies in one wallet app.
What if I lose my phone?
Don’t panic. If you wrote down your recovery phrase, you can simply download the wallet on a new phone, enter the phrase, and your crypto will be there. The coins live on the blockchain, not the phone.
Conclusion: Safety First
Setting up a crypto wallet might feel like learning a new language, but you’ve done it. You are now your own bank.
Whether you choose a simple software wallet or invest in a secure hardware wallet, the golden rule remains the same: Keep your recovery phrase safe. As long as that phrase is secure, your digital asset portfolio is yours and yours alone.
About the Author
Emily Bennett is the Content Lead at BeginnerWallets. She specializes in translating complex crypto jargon into easy-to-follow guides, helping thousands of beginners take their first steps in self-custody.